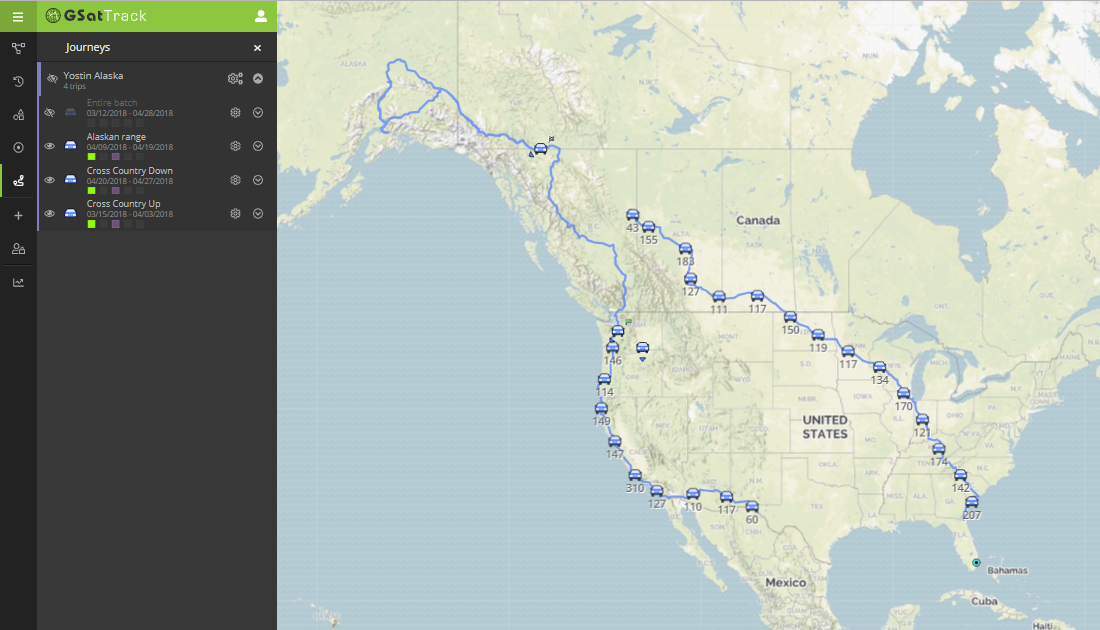
Feature Overview
The Journeys feature gives users the ability to save segments of their assets’ position report history as a viewable element that can be displayed on the Live and History views as well. Journeys are collections of Trips, which are individual reporting history segments that are defined by the user. Journeys can be collections of as many Trips as the user wants, and the number of data points in each Trip can be as little as one or the entire reporting history for the asset (though we can’t think of a reason to choose the latter).
The Journeys feature gives users the ability to display significant segments of an asset’s reporting history while simultaneously viewing live or historical data outside of the date range of those Journeys. Further, as this feature moves through the development cycle, Journeys will become a manipulable entity within GSatTrack, and users will eventually be able to interact with them in ways similar to those available for Assets, Places, and Geofences.
Journeys have been added to the main navigation panel, and can be managed in the same ways as Assets, Places, and Geofences.
Feature Design Theory
Solution Goals for Journeys
The Journeys feature set aims to provide a solution for two primary objectives of GSatTrack users. The first and foundational demand of this feature set is to give users a means of interacting with segments of data in the same ways in which they can interact with a single data point or a continuous historical period of data. To date, users in need of the ability to view and interact with data from two or more distinct ranges of data were unable to do so with GSatTrack.
Beyond the primary goal of providing users with the ability to interact with selected collections of asset data, the Journeys feature set also positions GSatTrack to be able to deliver a more complete solution for other feature sets like reporting and external sharing of position data. The customer segments that benefit most from these augmentations are those who require backdated logging capabilities, and those in the adventure markets, where sharing collections of position reports is the perfect way to document a road trip, hiking excursion, boat trip, or other outdoor activity.
Adding a Journey
To create a Journey, click the Add Item (+) button from the main navigation panel, then select Add Journey. A form will open in the main viewport, prompting users for the following information:
- Name: the name to be assigned to the Journey, will be displayed in the Journeys interface
-
Asset: choose the asset that will be providing the data for the Journey
-
Description: optional, will not be displayed in the interface
-
Color: select a color for the Journey to be displayed in the list panel
-
Status: enabled/disabled toggles the Journey’s viewability in the list panel; Disabled Journeys will not appear in the Journeys UI or anywhere in the portal
As part of creating a Journey, users will be prompted to add Trips to them, and each Trip is a collection of position history for the Asset selected above. Each Trip may include any number of position reports greater than 0, and there is no limit on the number of Trips a user can include in a Journey. Users may opt to add multiple Trips that do not have sequential start or end points, and they will be displayed without a connecting line between them.
The Add Trip section of the form will prompt users for the following information:
- Name: the name to be assigned to the Trip, will be displayed in the Journeys interface
-
Date Range of Data: Begin references the earlier of the two endpoints in the date range and End references the more recent of the two endpoints in the date range for the trip. Date Range can be as little as minutes, and as long as the user chooses.
-
Display Options: users will choose whether to show the Trip as a single segment with only start and end points, or if they wish to display all of the individual points between the start and end points
-
Status: enabled/disabled toggles the Trip’s viewability in the list panel; Disabled Trips will not appear in the Journeys UI or anywhere in the portal
After Trips have been added to a Journey, they will be listed in the bottom section of the Add Journey form. From here, users can manage these Trips if they feel they’ve made any errors, and can edit them by selecting the pencil icon on the left, or delete them by selecting the trash can icon on the right.
Interacting with Journeys
From the Journeys tab, users can view, expand, toggle visibility, and edit their Trips and Journeys. Each Journey will appear in the Journeys list tab in the same way Asset Groups appear in the Live and History views. Because Journeys are collections of Trips, they function similarly to Groups in this way. Each Trip’s visibility can be toggled by clicking the eyeball icon to the left of its name, and the entire Journey can be toggled on or off by clicking the eyeball next to its name. Expanding Journeys will show all Trips within that Journey, and expanding Trips will show all position reports within that Trip. Users will be able to interact with those position reports just like they would with an Asset in the Live or History view.
The Gear Icon
The gear icon for Journeys and Trips functions identically, as both offer users the ability to edit or delete the Journey or Trip directly from the list. If the user elects to edit the entity, they will be taken to the same form they used to create the Journey, and all aspects of that Journey or Trip can be edited from there.


